Showing posts with label Thank You. Show all posts

Thursday, March 29, 2012

Colour Create Challenge #93 - Deep Purple, Cream and Bright Green


Hello,
It's time to see what Julie has come up with for the challenge over at Colour Create this fortnight. Challenge #93 is to used Deep Purple, Cream and Bright Green with the option of extra bows. Here is the inspiration picture:
29 March - Challenge 93 - Julie -Deep Purple, Bright Green and cream 

I have to say that this is one of my all time favourite colour combos and I loved working on this challenge. Here is my card:


I used Rustic Cream cardstock for my base and main layer. I stamped the different flowers from Beautiful Blooms II in Sweet Plum ink and then masked them and stamped my leaves in Old Olive ink with the flowers.  Once I had stamped my flowers I used my Chevron Backdrop stamp to lightly stamp over the images with Chamomile tea dye ink. Finally I added some finishing touches to the flowers with  my purple and clear Atyou Spica glitter pens.  It was hard to get a clear picture but here is a close up of the glittery flowers. They look much better IRL:


I used some Plum Pudding satin ribbon to create my loops behind my sentiment. The sentiment was created by die cutting two Mat Stack 1 die cuts - one from Rustic Cream and one from Plum Pudding cardstock. I handcut the cream die cut a little smaller so the Plum Pudding could be used as a mat. The frame was stamped using my Round and Round frame in Plum Pudding ink. I then used my Thank You sentiment from Scattered Showers additions in Old Olive ink.  I stamped another flower and leaves, which I hand cut and adhered to the edge of my frame. Finally I added some silver rhinestones underneath my sentiment and a border around the edge of my card with my clear Atyou spica glitter pen.

The other girls in the team have created some stunning cards so hop on over and have a look at the Colour Create blog.


Supplies
Stamps: Beautiful Blooms II, Round and Round anniversary set, Scattered Showers additions (PTI); Chevron Backdrops (Lawn Fawn - from The Stamp Spot)
Cardstock: Vintage Cream, Plum Pudding (PTI)
Ink: Chamomile tea dye (PTI); Sweet Plum (Memento); Old Olive (SU)
Accessories: Plum Pudding satin ribbon, Mat Stack 1 die (PTI); dimensionals; Clear and Purple Atyou Spica glitter pens (Copic); silver rhinestones (Kaisercraft - from The Stamp Spot)

Friday, April 8, 2011

Say It With.... A Banner!


Hello,
Over at the AnnaBelle Stamps blog this week, the challenge is to say it with... A Banner!
Say_It_With_a_banner
As soon as I saw this challenge I thought I would go for the standard pennant style banner, but after die cutting and trying different ideas with my pennants, it just did not want to work for me, so I started all over again with a standard sentiment banner, using one of my favourite AnnaBelle Stamps - Ballerina Rose.
I cut a layer of cream cardstock and ran this through my Cuttlebug with my Canvas impression plate. I then stamped some small flowers from the Backgrounds By Design 1 set in Versamark on Sweet Blush cardstock and clear embossed them, colouring the petals in with a clear spica glitter pen. Once this was complete, I adhered the Sweet Blush card to my cream layer and then added a thin layer of glitter around the edge with  my Quickie Glue Pen. Some Chocolate Chip ribbon was wrapped around the middle and then the layers were matted on some Chocolate Chip cardstock before adhering to my Sweet Blush base.

I stamped 6 of the medium flowers from Ballerina Rose in Vintage Sepia ink and coloured them in with R81,R83 and R85 copics, adding some E59 to the centres. These were then fussy cut and dipped in glitter along the edges. The leaves were also handcut from the large flower stem image and then the flowers and leaves were assembled along the Chocolate Chip ribbon, with a couple popped up on dimensionals. The sentiment from Ballerina Rose was stamped in Vintage Sepia and then cut into a banner and inked with some Chamomile ink before adhering.
On the inside I used the same stemmed flower image, this time stamping in Blushing Bride ink and colouring with the same Copic markers. I used my Pretty In Pink marker to go over the flower edges to give some more definition and then added glitter to the flower centres. The sentiment was stamped in Vintage Sepia ink.
The other designers' creations are wonderful, so be sure to check them out: 

How To Play Along : 
- We post our challenges every Friday at 12:00pm AEST (AEDT during Daylight Savings).
- Our Sketch Challenge Runs from the last Friday of a month through till the last Friday of the following month.
- Each Friday in between we have themed challenges. To be eligible for the monthly prize of a $20 gift voucher to spend in store at AnnaBelle Stamps you MUST take part in the sketch challenge AND one of the weekly challenges.
- Please link directly to your entry not just to your blog.
- Include a link back to The AnnaBelle Stamps blog in your post.
- Please don't link to postings made prior to the date of our current challenge.  All projects submitted must be new.
- A maximum of 5 challenges may be combined including this one.        
- You may enter any challenge several times as long as each submission is with a new creation.
- We would love you to use AnnaBelle Stamps, but you can play along without them. For those who use AnnaBelle stamps and upload to the Gallery HERE then you will also be in the running to be our Monthly Guest Designer!

Thanks for visiting!
Kerry
Supplies
Stamps: Backgrounds By Design 1, Ballerina Rose (AnnaBelle Stamps)
Cardstock: Chocolate Chip, Very Vanilla (SU); Sweet Blush (PTI)
Ink: Versamark; Vintage Sepia (Versafine); Blushing Bride (SU); Chamomile Tea Dye ink (PTI)
Accessories: Clear embossing powder, Dazzling Diamonds glitter, Pretty In Pink marker, Chocolate Chip ribbon (SU); Linen/Canvas impression plate (PTI); Copic Markers; Atyou Clear Spica glitter pen

Thursday, April 7, 2011

Colour Create Challenge #68 Black, Pink and White

Hello, I am back with this Colour Create's fortnightly challenge and this week the challenge is to use pink, black & white with the optional extra - tulle. Here is the inspirational pic:
7 April - Challenge 68 - Julie
The sponsor for this week is Michelle's Scrapbooking.
MONTHLY SPONSOR
I have to admit that I found this card a lot more challenging than I first thought it would be. Pink and black are a favourite colour scheme of mine, but I just had trouble converting the idea in my head onto paper and the photos don't show the colours at their best either. Anyway here is my card:
I have been itching to ink up my Up,Up and Away set for weeks now and decided this would be the perfect challenge as I wanted to use them on acetate. So for my card base I used some Clearly Creative Cardstock from Papertrey ink and I used some designer paper along the bottom of my card front.  I wrapped some lace around the join and threaded it through a Sweet Blush button, adding my tag with sentiment.  I stamped the base of the three balloons directly onto my acetate with Stazon Jet Black ink and pierced a hole either side of the basket tops, threading through some pink bakers twine. My three balloons were stamped in Versamark, then Tuxedo black ink and finally clear embossed. I popped them up on dimensionals to give a little pop.
The inside of the card was kept very simple by adding some designer paper under my sentiment and mounting this on Sweet Blush cardstock. To hide the back of the balloons and designer paper, I simply stamped three more balloons and adhered them on the inside to cover the dimensionals. I also did the same with the designer paper. Unfortunately I didn't have any tulle, so I had to opt for lace instead, but make sure you check the other designers' creations out as they have done an awesome jobadding their tulle. Remember to link your card to the blog to be in the running to win this week's prize. All the details are over at the Colour Create blog.

Supplies
Stamps: Up, Up and Away (PTI)
Cardstock: Clearly Creative Cardstock, Sweet Blush, Stampers Select White (PTI); Tie The Knot DP (Bella)
Ink: Jet Black (Stazon); Tuxedo Black (Memento) Blushing Bride (SU); Versamark
Accessories: dimensionals, clear embossing powder (SU); lace (Kaisercraft); Sweet Blush button (PTI); Tiny Tags die set (Cuttlebug); pink striped bakers twine (MFT)

Friday, February 11, 2011

Say It With Polka Dots

Hi there!!
Sorry for my extended absence - this week has been so busy with my son's birthday sleepover and then Wed night I took my two boys to see 'Wicked' and it was great!! I am a massive fan of musicals but was a bit sceptical about whether I would like this or not. But I was really surprised - the music was great and the special effects were amazing! Also I stay after work on Thursdays to learn Auslan - sign language and my brain feels like mush at the end of it. Its an amazing experience to learn this, but I now have the utmost admiration for those who are proficient at it - it is quite difficult. Hopefully I will feel more confident by the end of the term!

Now onto my card today -over on the AnnaBelle Stamps blog the challenge this week is Say It With Polka Dots. I had a lot of fun with this and decided to also enter it into Card Positioning Systems challenge 204 as the sketch seemed to match my idea for this card.
Here is my card:
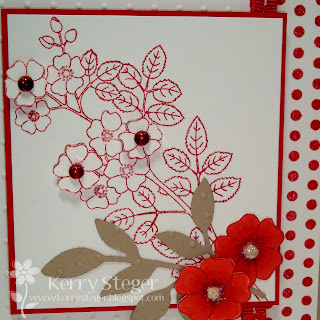
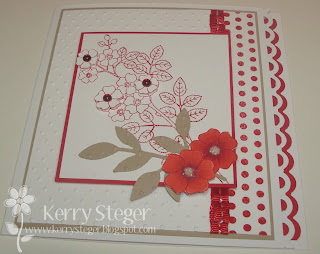
I went with one of my fave colour combos - Kraft, Red and White. I started off by adding a border to my card front with my Apron Lace punch. I matted my embossed/stamped polka dot layer on Kraft cardstock and then added this to my white base. The stamped polka dot section uses a stamp from the Backgrounds By Design 1 set and I used the Ballerina Rose set to stamp my main image in red ink. I then stamped it again and cut out three of the flowers and popped them up on dimensionals, adding some AnnaBelle Cherry Sprinkles to their centres. For my corner detail, I stamped the larger flower image from the Ballerina Rose set in Real Red ink a couple of times and coloured them with copics before cutting out and adding glitter to them. I also found a Sizzix die that matches this perfectly so I die cut my leaf image, embossed it with my Swiss Dots folder and layered it with my flowers in the corner. Some AnnaBelle Red stitched ribbon was gathered along the edge of the polka dots to finish the front off.
To complete the inside, I added one row of polka dots in red and then added my sentiment with Crumb Cake ink in the centre. I also added some red cardstock cut with my Apron Lace punch and positioned it so that when the card is closed, it layers in neatly beside my white Apron Lace border.
To see some other wonderful creations using Polka Dots,  have a look at the rest of the design team's cards:
Belles
Andrea
Sue W
Kylie
Chupa
Ida
Jerusha
Rene'
Lisa
Sue K

Bellas
Liz
Kerry
Don't forget that by posting your entry for this challenge on the AnnaBelle Stamps blog, you go in the draw to win a $20 voucher to spend at AnnaBelle Stamps.


Finally, speaking of stamps, its almost time for the Belles to begin previewing this month's new releases. Why not snag a blinkie for your blog - just copy and paste the code below:


I will be back on the weekend with more. Have a happy Friday!!


Supplies
Stamps: Backgrounds By Design 1, Ballerina Rose (AnnaBelle Stamps)
Cardstock: Stampers Select White (PTI); Kraft, Real Red (SU)
Ink: Crumb Cake, Real Red (SU)
Accessories: Cherry 3mm Sprinkles, red stitched ribbon(AnnaBelle Stamps); Dazzling Diamonds glitter, Sizzlit Little Leaves Die(SU); Apron Lace Punch (Fiskars); Swiss Dots Embossing Folder (Cuttlebug); Copic Markers