Today I got to play along with my first ever Papertrey Paper Dolls Challenge and I couldn't pass this one up - create your own background on your card.

I chose to use the set - Background Basics: Botanicals for my baby card, stamping the small flower background strip repeatedly on Stampers Select White and Sweet Blush cardstock. On the Sweet Blush strip I coloured in the centres of each flower with my white gel pen. I ran a layer of white card through my Cuttlebug with my Linen impression plate, rounding the top corners. I then lightly adhered the three strips along the bottom, then machine stitched the joins together. I added a strip of white lace and a row of pink pearls to finish off the background.
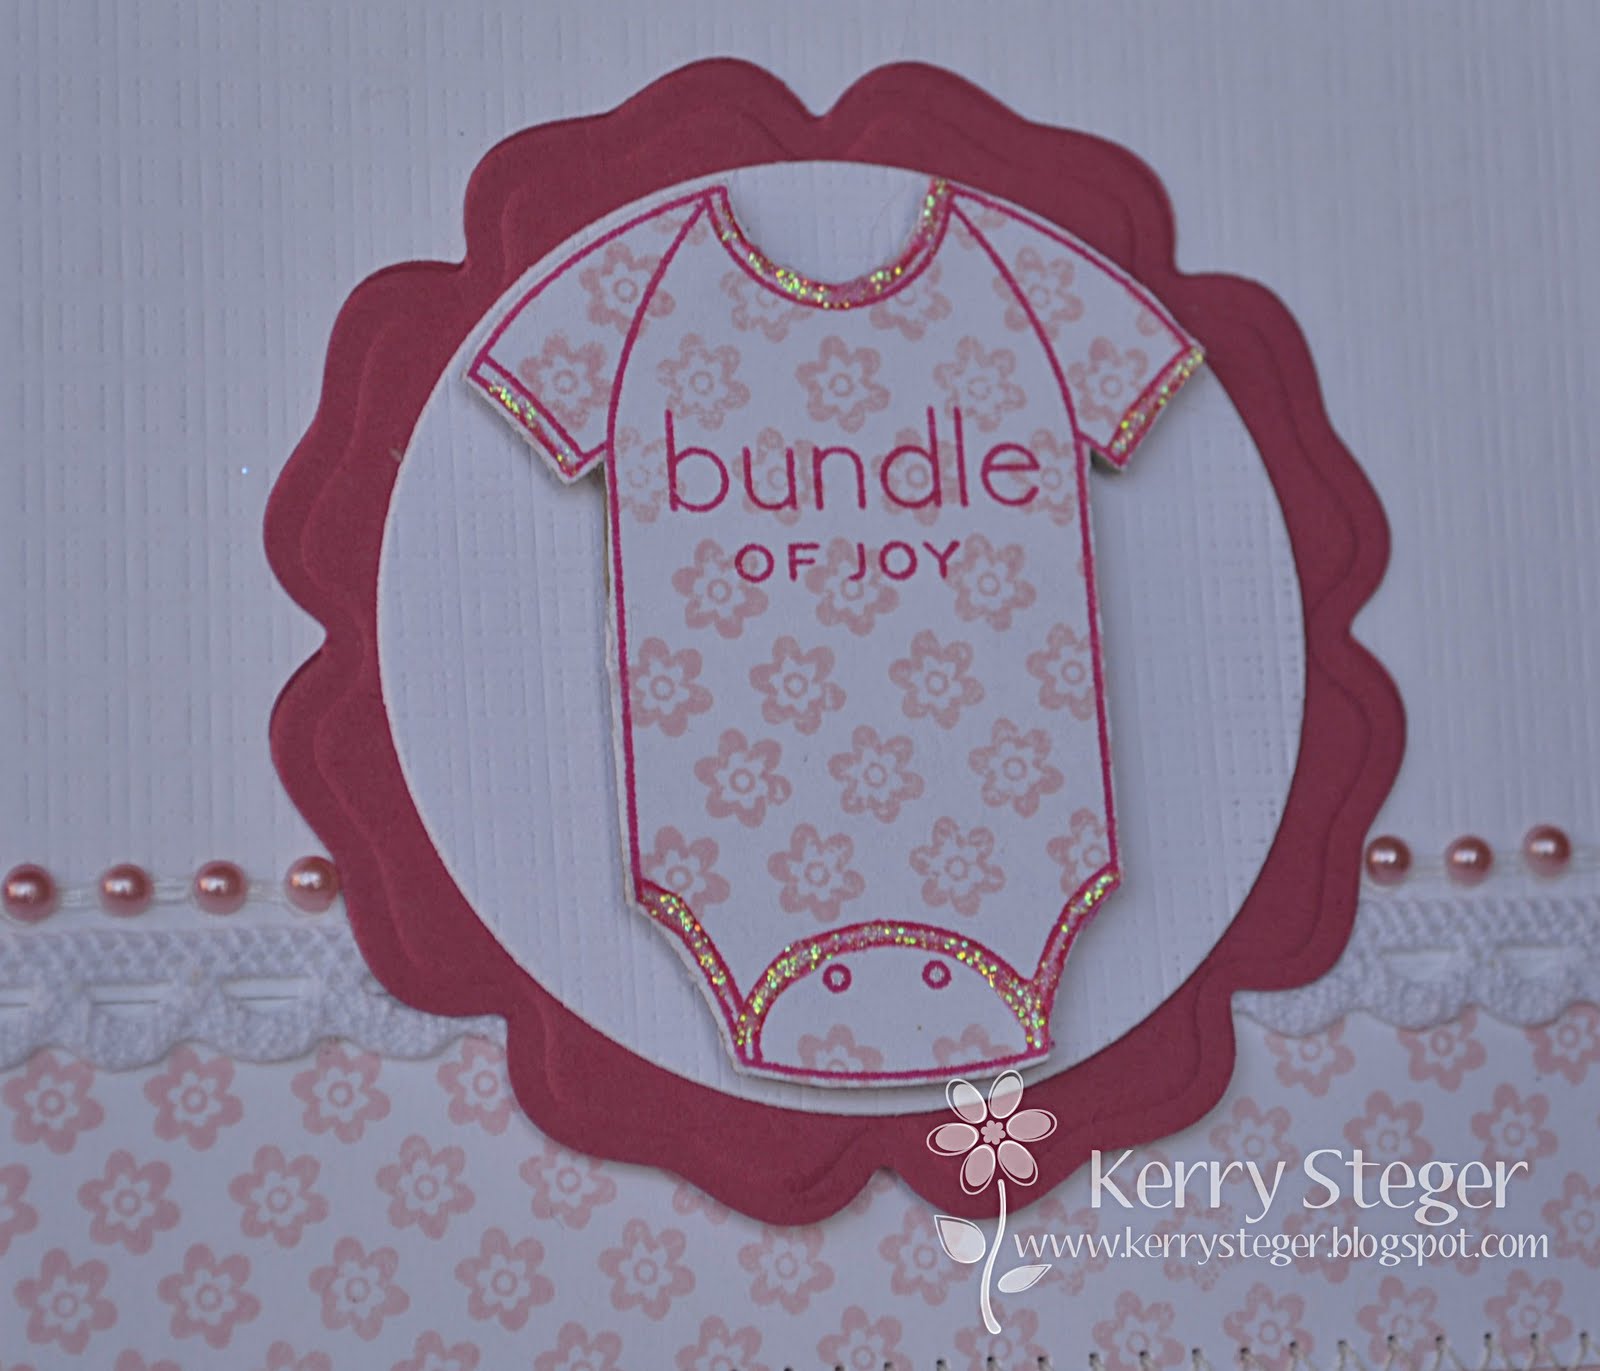
For my main image, I stamped the onesie image from Bitty Baby Blessings in Melon Mambo ink on one of Papertrey's white adhesive sheets, adhered it onto some chipboard and cut both layers out. The same flower background stamp was used to stamp the onesie in Blush Blossom ink. I then added the sentiment over the top. The onesie was popped up on dimensionals on a die cut circle which had also been embossed with the Linen impression plate. Finally a Rose Red Blossoms 4 die cut was used to mat the image. All the layers were then matted on some Rose Red cardstock and adhered to a Kraft base.

The top corners of the inside layer were rounded and another scallop edged strip of Sweet Blush cardstock was added which had been stamped with the flower background strip. The sentiment was stamped in Melon Mambo ink.
I also needed a baby boy card so I again pulled out my Bitty Baby Blessings set for this card.

I started with a Kraft base and then added a layer of Lemon Zest which had been machine stitched to a white panel after embossing it with my Argyle impression plate. I cut a strip of Bashful Blue cardstock and edged it with my Upper Crest border punch and added a strip of blue ribbon along one side. I also stamped a different background stamp from Background Basics: Botanicals in Bashful Blue ink on white card and added this strip alongside my ribbon.

For my focal point I stamped the sail boat on white card which I punched out with my Curly Label punch. I then stamped the boat image again on Kraft cardstock and cut out the bottom piece, adhering it to my white image. I stamped the boat a third time onto Lemon Zest cardstock and cut out the sail, stamping the same background pattern acoss the sail. This was then also adhered to my white piece. Finally I hand cut a larger curly label shape from Kraft card as a mat. The sentiment was stamped in Bashful Blue ink and cut into a banner.

On the inside, I stamped the tiny sailboat repeatedly in Kraft ink along the bottom and added a sentiment stamped in Bashful Blue ink.
Thanks for looking!

Supplies
Baby Girl Card
Stamps: Baby set, Background Basics: Botanicals (PTI)
Cardstock: Select White, Kraft, Sweet Blush, White Adhesive Sheet (PTI); Rose Red (SU); Chipboard
Ink: Melon Mambo, Blush Blossom (SU)
Accessories: Pearl strip, Lace (Kaisercraft); Linen impression plate (PTI); Blossom 4 Nestability, Circle Nestability (Spellbinders); Scallop border punch (SU); corner rounder; white gel pen (Signo)
Baby Boy Card
Stamps: Baby set, Background Basics: Botanicals (PTI)
Cardstock: Select White, Kraft Lemon Zest (PTI); Bashful Blue (SU); Chipboard
Ink: Crumb Cake, Bashful Blue, So Saffron (SU)
Accessories: Argyle impression plate (PTI); Curly Label punch (SU); Upper Crest border punch (Fiskars); blue ribbon


Adorable cards Kerry!! Great idea to coordinate the onesie with your stamped bg. I love the added detail of the stitching to your baby boy card. So glad you joined our Paper Dolls challenge!
ReplyDeleteThese are great cards! I especially like that you finished the insides. Thanks for playing along with the Paper Dolls.
ReplyDelete